DT C.C. Designs – Paper piecing with digital stamps tutorial
Hello everyone!
Today it's my turn for another MIM. I really enjoy paper piecing so I
want to show you how to paper piece an C.C. Designs / All That Scraps digital stamp to add dimension and
texture on your projects.
Supplies you’ll need:
- All That Scraps digital stamp
- Design paper
- Smooth cardstock compatible with alcohol based inks like Copic markers (but you can also do it with watercolor paper)
- Regular copy paper
- Removable double sticky tape or masking tape/transparent adhesive tape
- Glue pen
- Sharp scissors
- Other usual cardmaking supplies to create your card
First, choose a digital stamp on your computer. For this
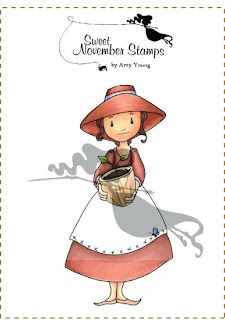
project, I used Garden Girl Gertie DIGI (Sweet November Stamps). Be sure the areas you want to
paper piece are not too small because it could be difficult to cut and
assemble. Adjust the size of your digi image to fit your needs.
Now print your digi stamp two times (and take notes of how
your printed paper comes out because later, you’ll need to be able to lay your paper
down in the same position):
1. on one sheet of smooth cardstock or watercolor paper (this
is the base image you’ll need to assemble your paper piecing),
2. on one sheet of regular print paper.
Cut a big enough piece of design paper to cover the part you
want to paper piece. Then tape your
patterned paper over your digi on the regular print paper sheet. To do
that, you can use removable double sticky tape (that's what I usually do) OR masking
tape/transparent adhesive tape. It’s very important to adhere for sure the
top of the design paper that goes into the printer first! Personally, I’ve
never had problems with jam. Put this paper again on your printer and print the
same image out.
Your paper piece is ready to be cut ! Use sharp scissors.
To give a beautiful finished appearance and to keep the
outlines, run a black marker around the edges.
Final step: color your base image with your alcohol markers (I
did it with Copic markers) or Distress Inks if you use watercolor paper. And only then glue the cut-out
piece on the base image. Make sure to add enough glue but not too close to the
edges! Finish your layout. You can match your paper pieced image to
your background paper as I did. Here is my card!
I hope you enjoyed this tutorial. Thank you for stopping by.
Wish you a creative day !
♥ Francine


Comments
Et donc j'ai bien vu hier sur instagram que tu préparais un tuto. Je me demandais quel était le sujet. Tu as bien gardé le suspense. Paper piecing digi pas mal pas mal ;0)
J'y avais jamais pensé et franchement chapeau. Bien fait et très belle carte. Même que je ne suis pas fan de ces motifs d'ATS, mais toi tu réussi toujours à très bien les mettre en page.
Te souhaite une bonne semaine et au plaisir de guignier encore sur Instagram ;0)
Becos
Babette l'ex-taupe
LG Irene
Bisous
Jasmina